Greg Hung World explorer, film-maker & entrepreneur originally from Vancouver, Canada and based in Taipei Taiwan
How to do a digital zoom in Final Cut Pro X of Tokyo
I’ve recently started working from a co-working space in Taipei and recently I’ve been inspired to create some more Final Cut Pro X Video lessons. This lesson is on how to do a digital zoom in Final Cut Pro X of Tokyo. I went to the Tokyo Metro towers in Shinjuku to film the shot. I forgot my tripod plate so I couldn’t use my tripod or dolly. I couldn’t use it anyways because like most observation platforms in tall towers you have to deal with reflective glass. I ended up taking off the lens hood and use a stable handheld shot pressed right against the glass to get this shot. In post-production I had to use using key-framing and scaling to add some production value to the clips
Techniques learned in this video
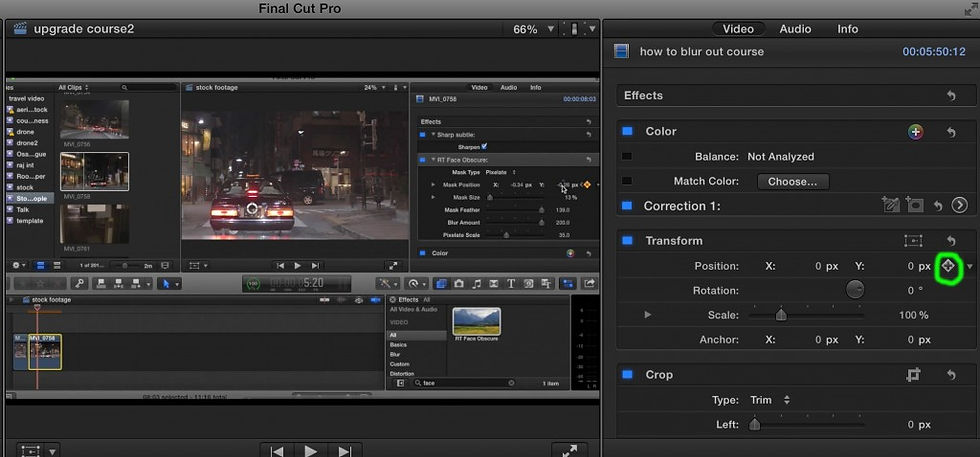
Key-Framing – is a useful technique to learn as it gives you the ability to apply a certain video effect at different points within a video clip. Whenever you see the plus diamond icon you can use key-framing
Scaling – Scaling allows you zoom into a video clip. The default is 100%. If you have filmed at 1920 X 1080 or higher you can zoom in a bit for a digital zoom. You can also use this technique for a picture because the resolution on an image still is much higher.
Improvisation – Like I said I forgot my tripod plate, which meant I couldn’t use a tripod or dolly for this filming trip in Tokyo. I improvised with the environment I had to film in with what I had. I had a good view from the observation platform and I pressed the lens again the glass to get a stable shot with no reflection.
Whenever you see the key-icon that means you use key-framing for this effect. This is a really powerful technique. Did you find this helpful? If so let me know. I’m thinking of producing a Final Cut Pro x of the techniques I use for videos from easy to advanced.

When you see a key-frame icon (circled in green) you can use this technique
Comments